
Jul 22, 2025

Nate Maynard
Managing identity and access across your organization just got easier. With Natoma's new Okta MCP integration, you can now connect your Okta instance directly to LLMs and agents, enabling powerful automation and streamlined user management workflows. This guide walks through the complete setup process, from creating your Natoma organization to making your first Okta requests, using Claude as an example.
What You'll Achieve
By the end of this setup, you'll be able to ask your LLM to perform Okta operations like:
Fetching user information and account details
Creating and managing user accounts
Assigning users to groups and applications
Running bulk operations and onboarding workflows
All of this happens securely through Natoma's managed connection system, giving you the power of Okta's API with natural language interfaces.
Prerequisites
Before starting, ensure you have:
Admin access to your Okta instance
Claude Desktop installed on your machine
Step 1: Set Up Your Natoma Organization
Begin by creating your organization in Natoma. This will serve as the central hub for managing all your connected services and agents.

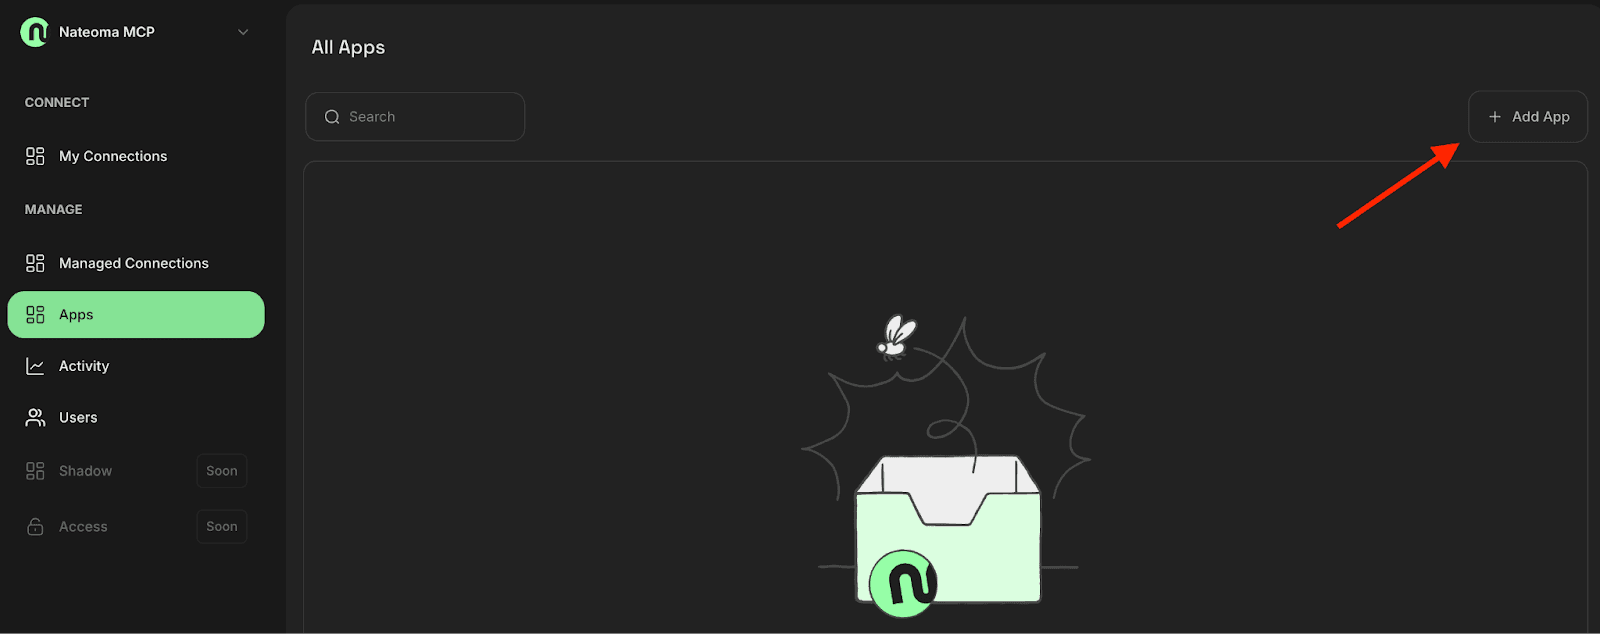
Navigate to the Apps section and select "Add App." Here, you'll find a comprehensive list of available integrations including Okta, Datadog, Slack, and many others. Each app represents a service that can be connected to your agent, expanding the LLM’s capabilities into your existing tech stack.
Step 2: Configuring Okta Integration
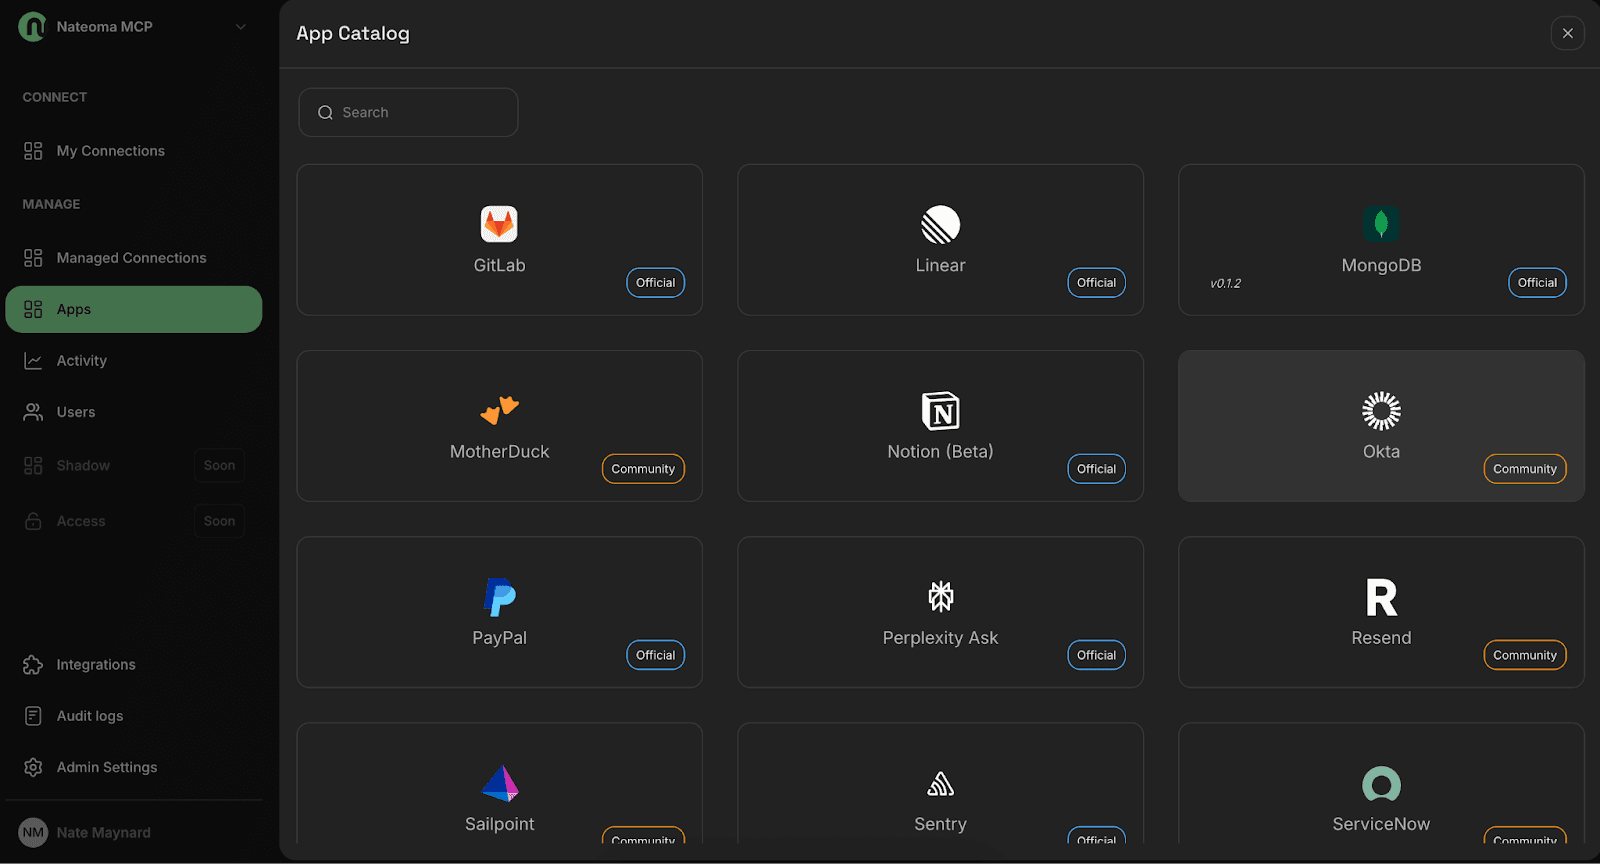
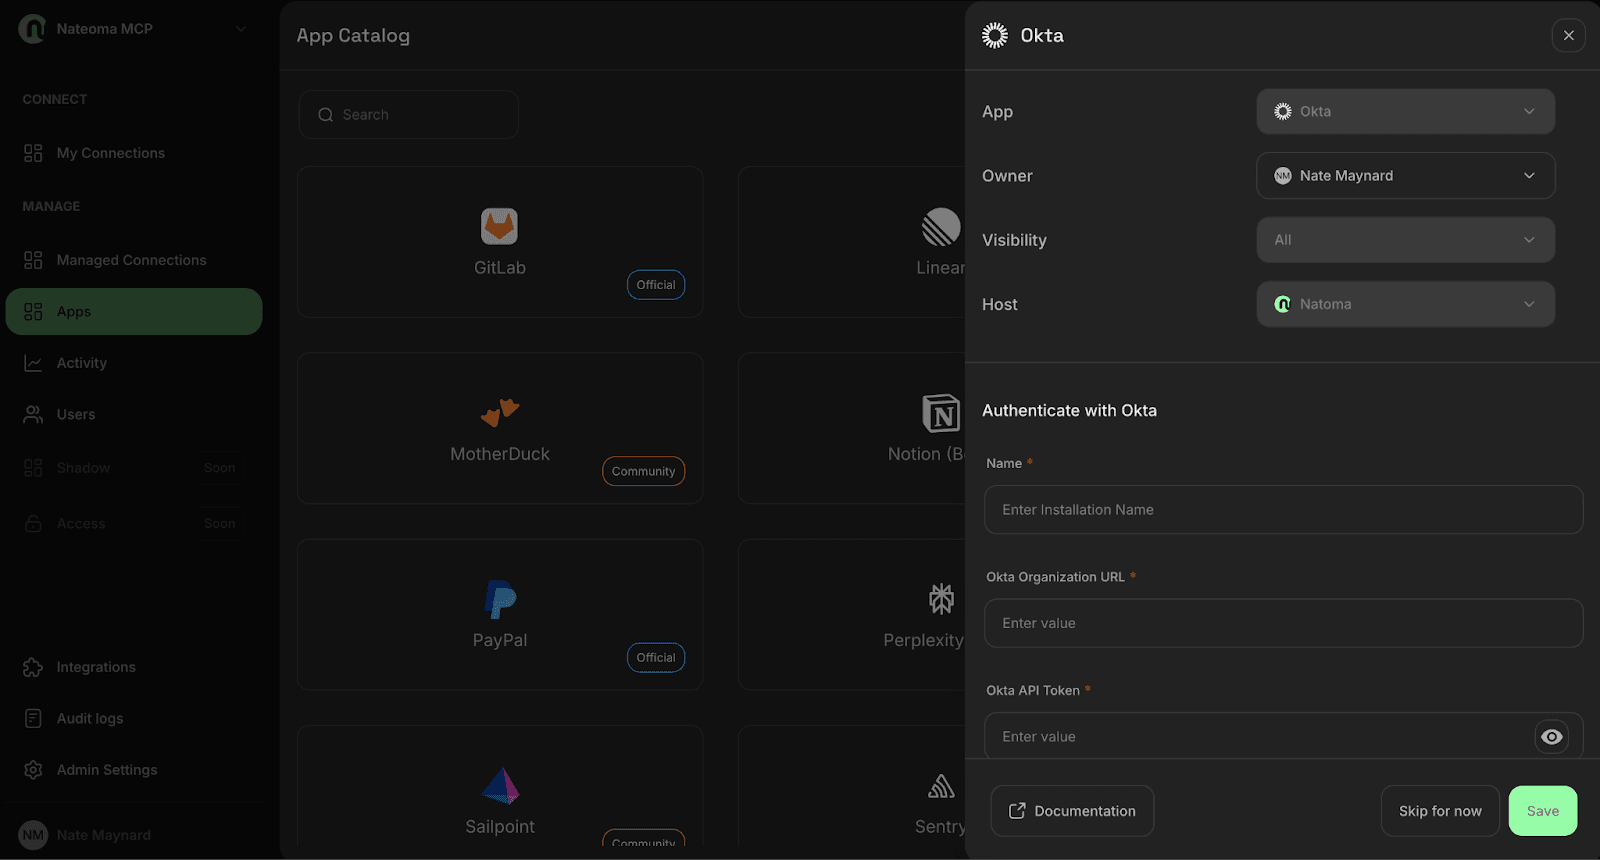
Select Okta from the App Catalog. You'll be prompted to configure the connection options, but first, you'll need to generate an API token from your Okta admin panel.
Generating Your Okta API Token
In your Okta admin console, navigate to Security → API → Tokens. =>
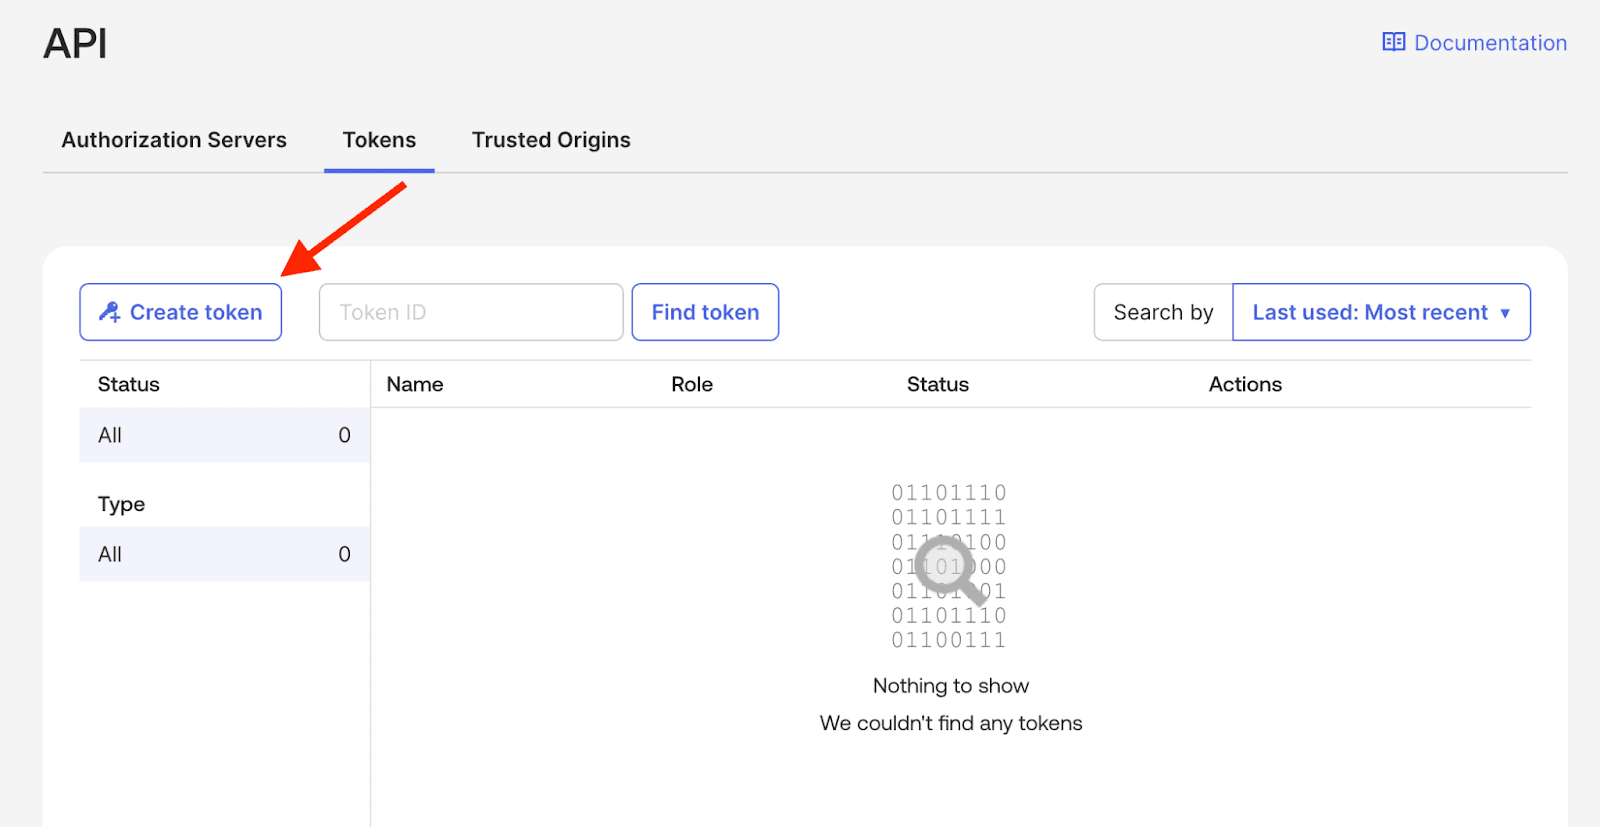
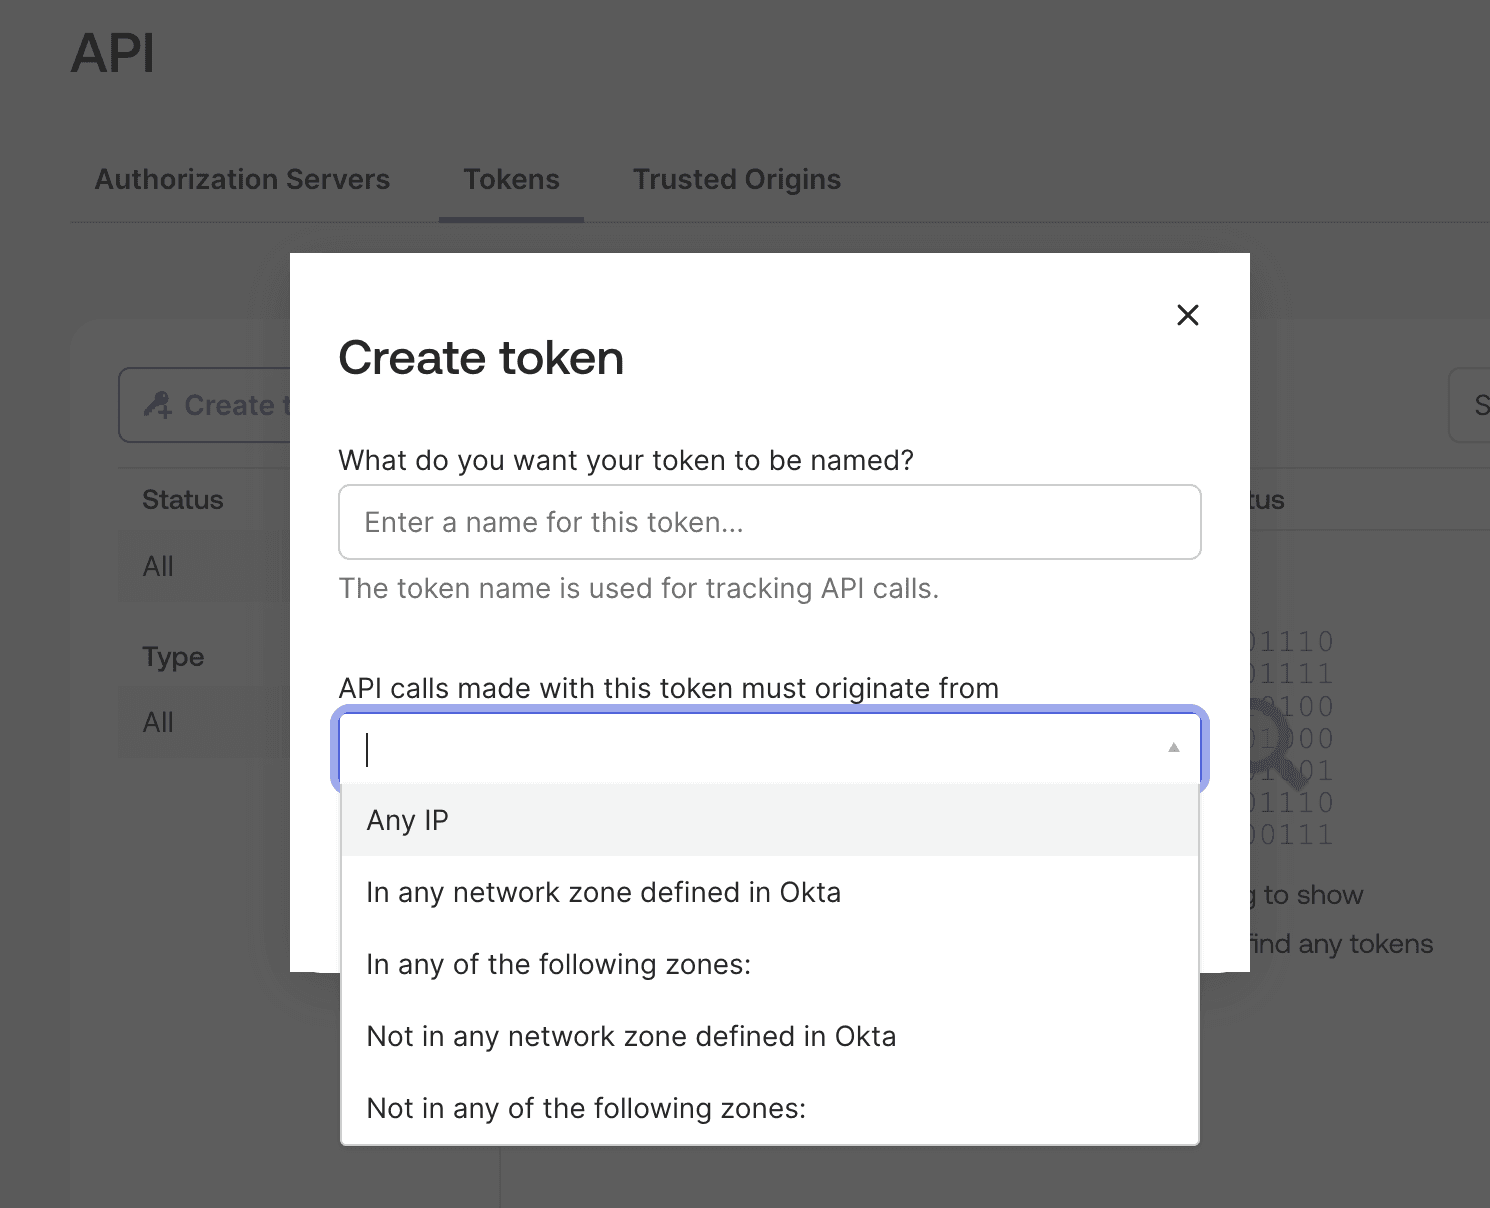
Click "Create Token", provide a descriptive name for easy identification, and configure where API calls may originate. Have your authenticator app ready for step-up verification. Okta will generate a unique API token that you'll use to authenticate the connection.
Important: Copy this token immediately and store it securely. Okta will only display it once.
Step 3: Completing the Natoma Connection
Return to Natoma to add the Okta integration. This will allow you to configure which tools you would like your agent to have access to.
Enter your Okta instance details, along with the API token you just generated. Add any additional configuration parameters as needed, then save the connection.
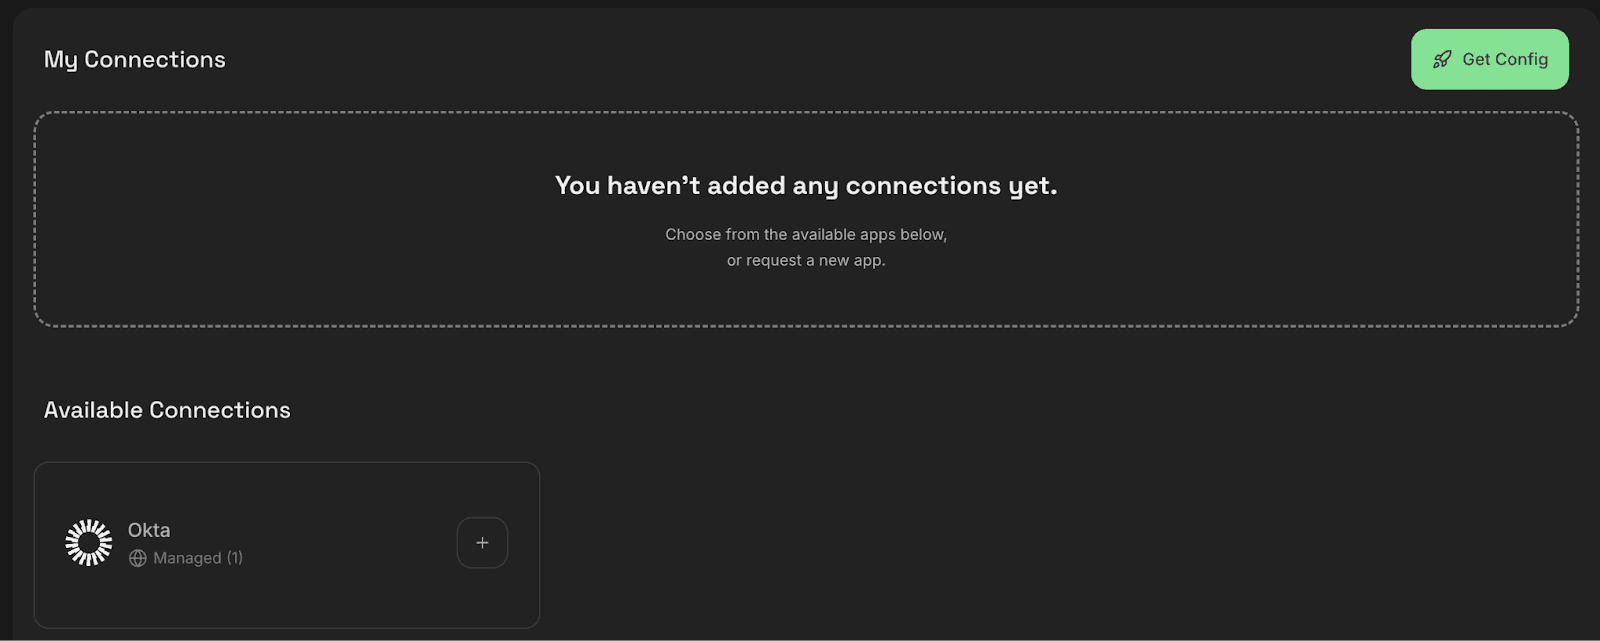
Once saved, Okta will appear as a managed connection under "My Connections" in your Natoma dashboard. This centralized view makes it easy to monitor and manage all your connected services.
Step 4: Configuring Claude Desktop
With your Okta connection established in Natoma, you can now integrate it with Claude Desktop using the Model Context Protocol (MCP). Navigate to the My Connections screen and hit the + button next to the available connections to add one for yourself.
From your Okta connection in Natoma, click the "Get Config" button. This generates a configuration snippet specifically formatted for Claude's MCP settings. The system will also provide you with a unique API key for this connection.
Updating Claude's Configuration
Open Claude Desktop and navigate to Settings → Developer → Edit Config. This opens your claude_desktop_config.json file where you'll add the Natoma-generated configuration.
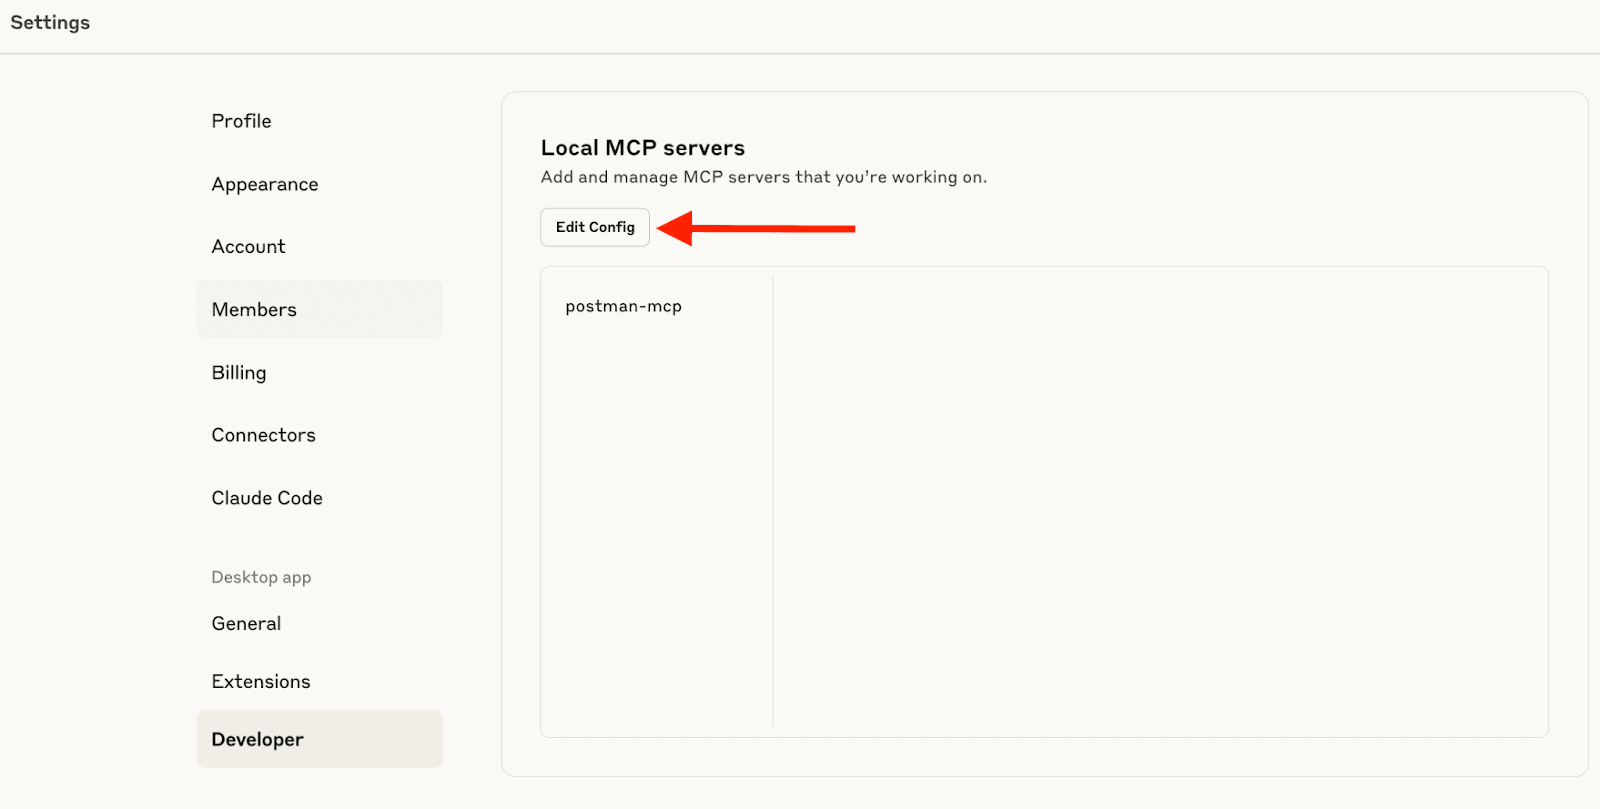
Paste the configuration snippet into the appropriate section of your JSON file. The configuration includes all necessary connection details and authentication credentials to enable the Okta integration.
After saving your changes, restart Claude Desktop completely (close and reopen the application) to load the new configuration.
Step 5: Verification and Testing
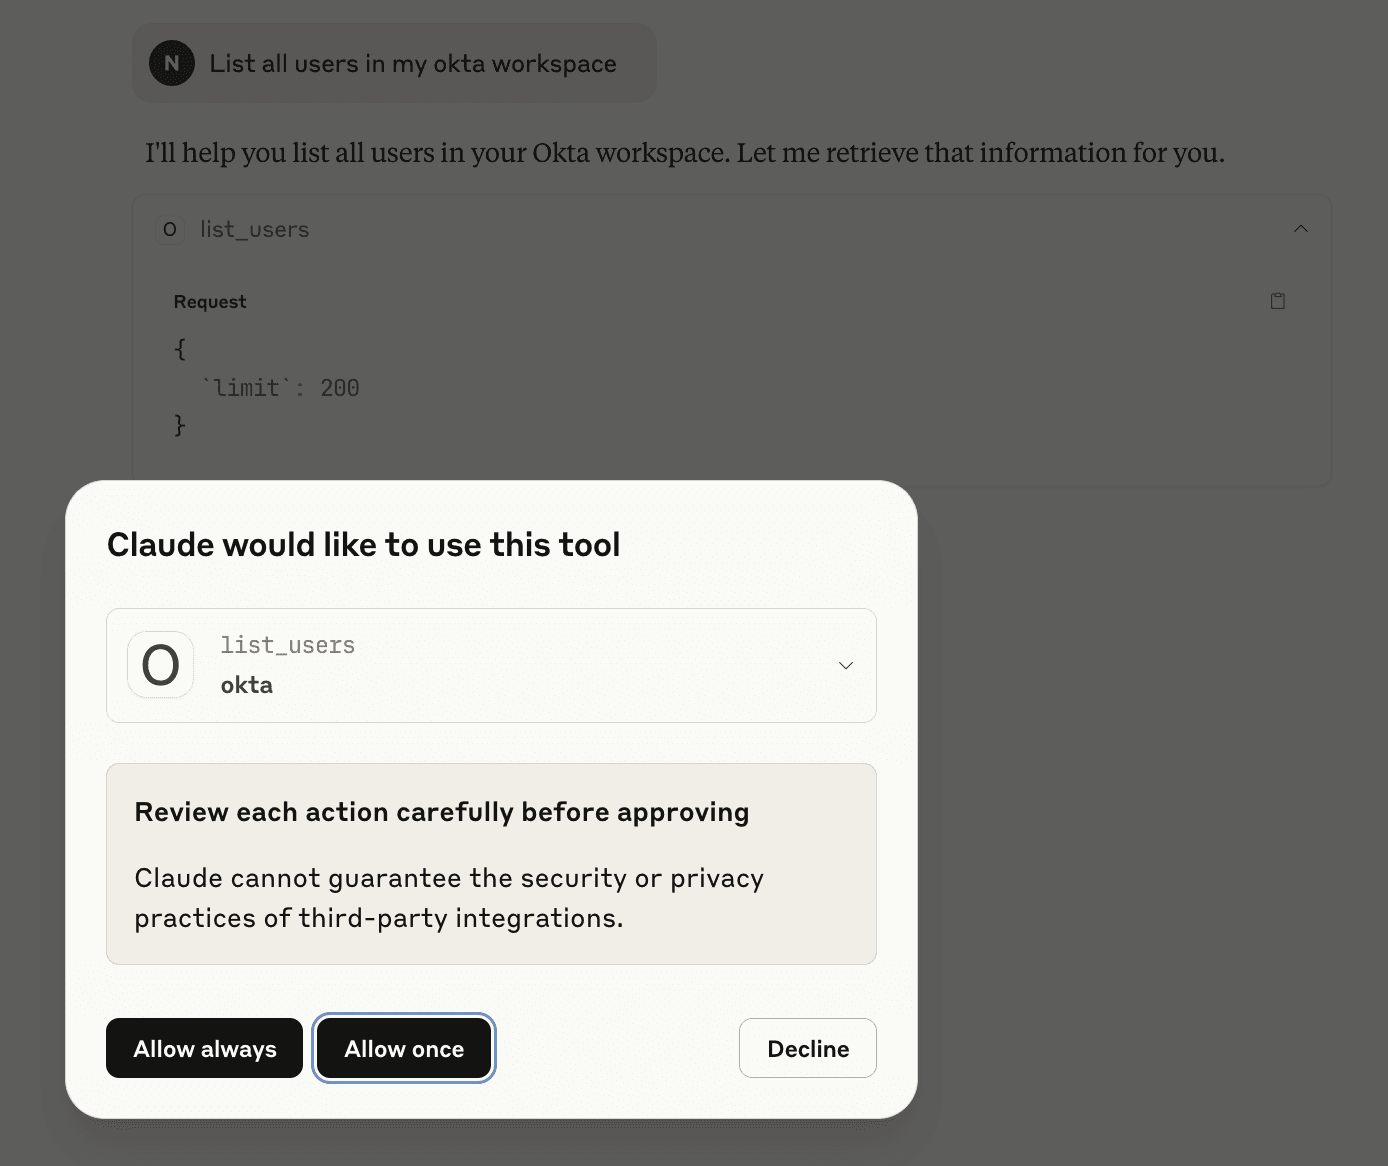
To confirm everything is working correctly, check Claude's settings under your chat interface. You should see the MCP server listed as connected, indicating that the Okta integration is active and ready for use.

Try a simple test query like "Show me information about user john.doe@company.com" or "List all users in the Engineering group" to verify the connection is working properly. You can choose to allow MCP tool usage once, always allow, or decline.
What's Next?
With Okta connected to Claude through Natoma, you've unlocked powerful identity management capabilities. You can now:
Streamline user onboarding: Ask Claude to create user accounts, assign appropriate groups, and provision application access
Automate routine tasks: Bulk operations that previously required manual work can now be handled conversationally
Improve security workflows: Quickly audit user access, identify inactive accounts, and manage permissions
Generate reports: Extract user data and group memberships for compliance and reporting purposes
The natural language interface makes complex Okta operations accessible to team members who might not be familiar with API calls or admin interfaces, while still maintaining the security and control that administrators require.
Security Considerations
Of course, these powerful capabilities are nothing without tight security controls. Natoma’s hosted MCP platform helps ensure that users can move quickly without compromising on security.
This integration maintains high security standards by using secure API tokens for authentication, operating through Natoma's managed connection system, preserving all existing Okta security policies and permissions, and providing audit trails for all operations
The connection respects your existing Okta permissions model, so Claude can only perform operations that the associated API token has been granted access to perform.
Troubleshooting
If you encounter issues during setup:
Verify your API token has the necessary permissions in Okta
Ensure Claude Desktop has been fully restarted after configuration changes
Check that your Natoma connection shows as active
Confirm the MCP server appears as connected in Claude's settings
With this powerful integration in place, managing your organization's identity and access becomes as simple as having a conversation with Claude. The combination of Natoma's connection management and Claude's natural language processing creates a seamless bridge between human intent and system automation.